First, a full disclosure: I’m part of the StimulusReflex core team and have been in love with it for about a year now. Having done many flavors of client-side JavaScript programming, I’ve also become a fan of the HTML-over-the-wire approach which is how I shape my Rails (and other) apps with Stimulus.
All that said, when @hopsoft published his Twitter clone in 10 minutes video, my interest to pair it with the Turbolinks iOS Wrapper was sparked. After all, it is fair to assume that websockets (which is what StimulusReflex is ultimately built upon) work natively with iOS’s WKWebView, but I wanted to see it live.
That’s why I made this short video walkthrough, below are my step by step notes:
(Note: you can also skip everything and go straight to the source code on Github)
So here’s what we’re going to do:
- Set up an iOS app with Turbolinks enabled
- Render HTML in a Turbolinks-powered
WKWebView - Navigate the iOS app by vanilla Turbolinks
visits - Handle form submissions in the iOS app
- Use Action Pack Variants to spice up native views (and point out some gotchas)
1. Setup
First of all we need to clone the chatter project from Github, and start it:
$ git clone https://github.com/hopsoft/chatter.git
$ cd chatter && bin/rails s
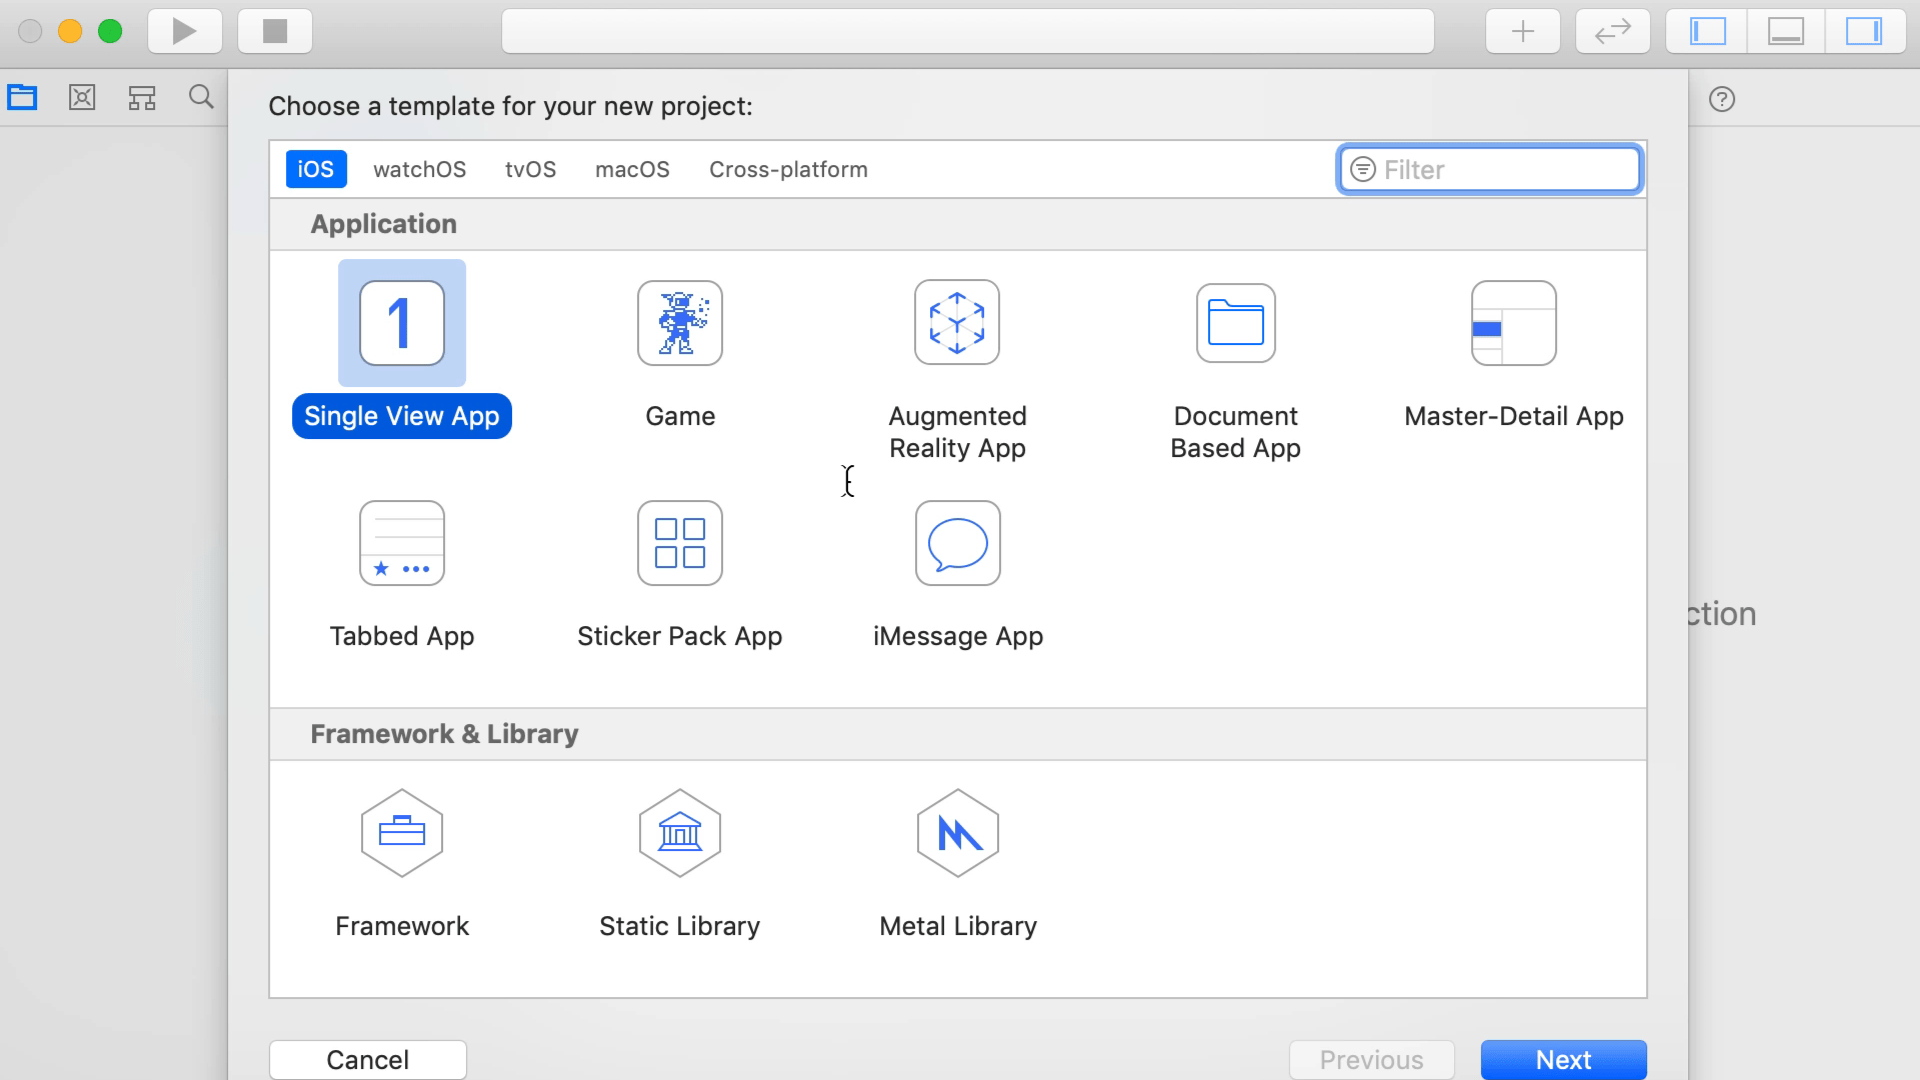
Next, open XCode and create a single app view project:
For easy configuration, we’re going to use CocoaPods to set up our dependencies.
$ cd chatter-ios && pod init
In our Podfile, let’s add Turbolinks as a dependency and install it:
target 'chatter-ios' do
  # Comment the next line if you don't want to use dynamic frameworks
  use_frameworks!

  # Pods for chatter-ios
  pod 'Turbolinks', :git => 'https://github.com/turbolinks/turbolinks-ios.git'

  # ...
end
$ pod install
On a final note, as in Sam Stephenson’s Turbolinks 5 talk, we have to change a plist setting in order for local (non-TLS) development to work:
plutil -insert NSAppTransportSecurity -json '{"NSAllowsArbitraryLoads":true}' chatter-ios/Info.plist
2. Add Turbolinks-iOS to Your iOS App
First of all, close XCode again and make sure to open the workspace instead, to load the project along with its dependencies:
$ open chatter-ios.xcworkspace
In SceneDelegate, add a UINavigationController and use it as the window.rootViewController in scene:
var navigationController = UINavigationController()
func scene(_ scene: UIScene, willConnectTo session: UISceneSession, options connectionOptions: UIScene.ConnectionOptions) {
    // ...
    if let windowScene = scene as? UIWindowScene {
        let window = UIWindow(windowScene: windowScene)
        window.rootViewController = navigationController
        self.window = window
        // ...
    }
}
Next, we’re going to actually import Turbolinks and set up a session. To your import statements, add
import Turbolinks
and to your top-level variable declarations, add a session:
var window: UIWindow?
var navigationController = UINavigationController()
var session = Session()
We are going to need a method to navigate from one ViewController (roughly equalling a server route) to the next. In Turbolinks, this functionality is called visiting, so let’s declare a visit method:
func visit(URL: NSURL) {
    let viewController = VisitableViewController(url: URL as URL)
    navigationController.pushViewController(viewController, animated: true)
    session.visit(viewController)
}
Let’s give it a spin by doing an initial visit:
func scene(_ scene: UIScene, willConnectTo session: UISceneSession, options connectionOptions: UIScene.ConnectionOptions) {
    // ...

    if let windowScene = scene as? UIWindowScene {
        // ...
        visit(URL: NSURL(string: "http://localhost:3000")!)
        // ...
    }
}
After running the app again, you should see the Chatter start screen in your iOS Simulator:
3. Set Up a Session Delegate to Handle Visit Proposals
Our initial app setup may be complete, but if you try clicking some links, you might run into errors. That’s because we need to tell Turbolinks how it should handle visit proposals, i.e., navigation events triggered from within the WKWebView. To do this, we need to make our SceneDelegate the session’s delegate, and implement the protocol:
func scene(_ scene: UIScene, willConnectTo session: UISceneSession, options connectionOptions: UIScene.ConnectionOptions) {
    // ...

    if let windowScene = scene as? UIWindowScene {
        // ...
        visit(URL: NSURL(string: "http://localhost:3000")!)
        self.session.delegate = self
        // ...
    }
}
and somewhere outside, for example in the bottom of your SceneDelegate file, we have to set up the callbacks for a visit proposal:
extension SceneDelegate: SessionDelegate {
    func session(_ session: Session, didProposeVisitToURL URL: URL, withAction action: Action) {
        visit(URL: URL as NSURL)
    }

    func session(_ session: Session, didFailRequestForVisitable visitable: Visitable, withError error: NSError) {
        // TODO handle errors
    }
}
4. Handle Form Submission
Form submissions need special treatment on the server side as well as in the iOS app. First of all, we need to make sure that our forms are handled by Turbolinks in the Rails app. By making the posts form remote: true, we will achieve that
- The form is sent via a XHR request
- Rails responds to that request with a Turbolinks visit:
Turbolinks.visit("http://localhost:3000/posts", {"action":"replace"})
In the iOS SceneDelegate, we refactor the visit method to accept an action and switch on it. In the case of a Replace, we reset the current view controller, either by popping the last one and pushing the new one onto the stack, or just by setting the new view controller as the only one:
func visit(URL: NSURL, action: Action = .Advance) {
    let viewController = VisitableViewController(url: URL as URL)

    if action == .Advance {
        navigationController.pushViewController(viewController, animated: true)
    } else if action == .Replace {
        // in case there is only one view controller on the stack, replace it manually
        if navigationController.viewControllers.count == 1 {
            navigationController.setViewControllers([viewController], animated: false)
        } else {
            navigationController.popViewController(animated: false)
            navigationController.pushViewController(viewController, animated: false)
        }
    }

    session.visit(viewController)
}
5. Use Variants to Improve Native Views
As a last step, we’re going to try and give our iOS app a different look than the browser-based app. In reality, you might want to do this to give your Turbolinks-iOS app a more native look and feel. The way to do this in Rails is via Action Pack Variants, i.e. different view templates rendered based on a condition that is evaluated server side. The most common condition that’s used in such a case is the User Agent. Therefore, we’re going to append a custom string, Chatter iOS, to the user agent emitted by iOS:
import Webkit
// ...
lazy var session: Session = {
     let configuration = WKWebViewConfiguration()
     configuration.applicationNameForUserAgent = "Chatter iOS"
     return Session(webViewConfiguration: configuration)
}()
In the Rails app, let’s spice up the views with variants. Before we do that, though, let’s add two <meta> tags to the application layout, so the view fits into the viewport nicely:
<meta charset="utf-8">
<meta name="viewport" content="width=device-width, initial-scale=1, shrink-to-fit=no">
In our posts_controller.rb, we set the request.variant in a before_action, by checking if the string we added to the user agent before is present. Note that the :ios symbal is completely arbitrary.
before_action :set_variant

# ...

private

def set_variant
  request.variant = :ios if request.user_agent =~ /Chatter iOS/
end
Now create index.html+ios.erb and _post.html+ios.erb by duplicating the files, and change something. In my example, I made the card background dark:
<div class="card mb-2 text-white bg-dark">
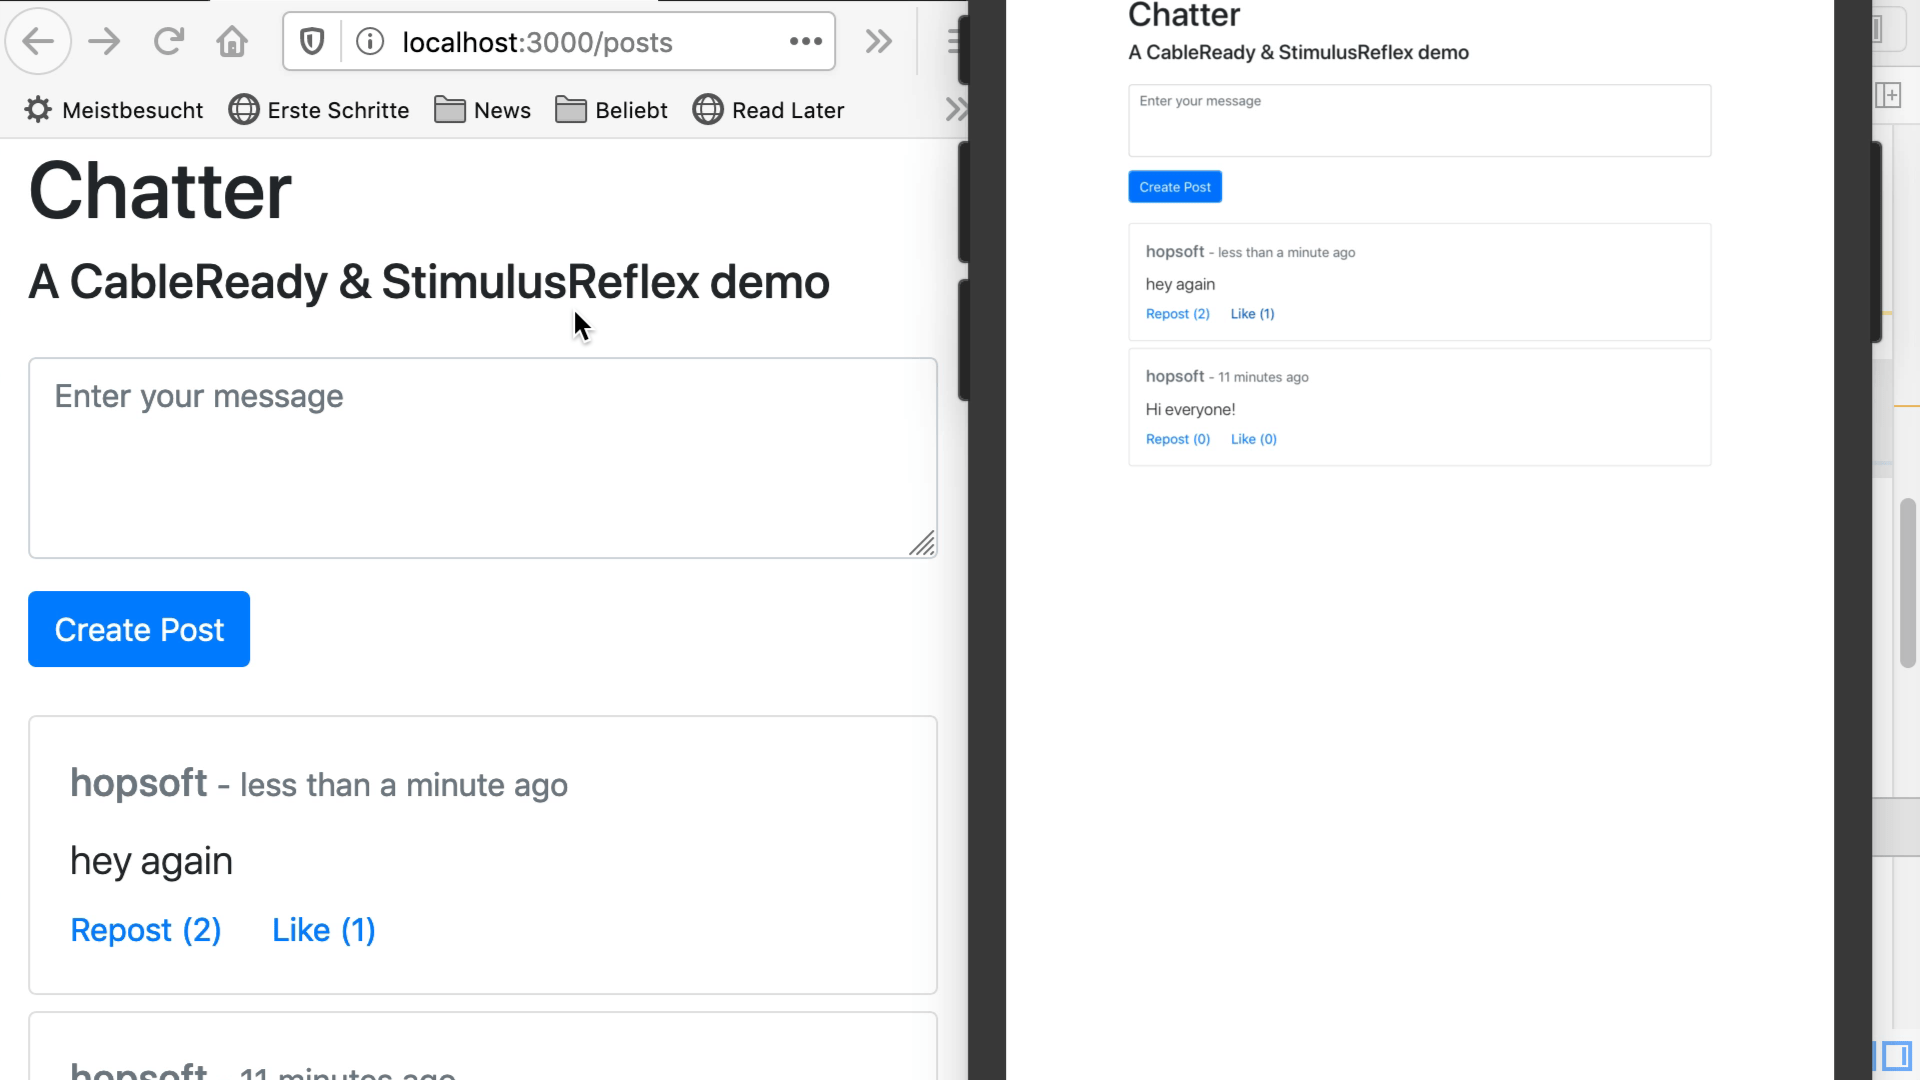
Now reload your simulator and browser, and try it out. First we notice that the variant gets picked up by our iOS app. Hooray 🎉! Soon you’ll realize, though, that now we have a different problem: CableReady sends the iOS variant to the browser and vice versa. Behold:
That’s actually not surprising, because CableReady is executing the broadcast in the context of the sender. So if I submit the post form from the iOS app, it will render_to_string the iOS variant and broadcast it to all subscribers. That’s clearly not what we want - we want the subscriber to decide which variant to receive.
cable_ready["timeline"].insert_adjacent_html(
  selector: "#timeline",
  position: "afterbegin",
  html: render_to_string(partial: "post", locals: {post: post})
)
cable_ready.broadcast
To be completely honest, I chewed on this for some time, but as you’ll see, the solution is quite simple and elegant.
6. Parameterize the Channel
In many ways, WebSockets are quite orthogonal to regular HTTP request/responses. In a normal request, we can tell which variant is to be served in a variety of ways. With a web socket connection, there is no request, just a subscriber consuming a channel. So what we need to do is prepare different streams to broadcast our variants to. Let’s start on the client side, again:
In app/javascript/channels/timeline_channel.js, we need to pass some parameter according to the user agent, (similar to setting the variant). That’s easy, because the create method for subscriptions lets us specify arbitrary parameters along with the channel identifier. Let’s rewrite this as follows:
consumer.subscriptions.create({ channel: "TimelineChannel", agent: /Chatter iOS/.test(window.navigator.userAgent) ? "ios" : "" }. {...})
Essentially, this is the corresponding way of identifying the user agent as we did on the server: We check a regular expression against the window.navigator.userAgent. Easy-peasy! Now, on the ruby side, in timeline_channel.rb, we need to pick this up:
class TimelineChannel < ApplicationCable::Channel
  def subscribed
   stream_from "timeline#{params[:agent]}"
  end
end
All that’s left to do is, in posts_controller, we have to add a second cable ready broadcast:
cable_ready["timeline"].insert_adjacent_html(
  selector: "#timeline",
  position: "afterbegin",
  html: render_to_string(partial: "post", locals: {post: post}, variants: [])
)
cable_ready["timelineios"].insert_adjacent_html(
  selector: "#timeline",
  position: "afterbegin",
  html: render_to_string(partial: "post", locals: {post: post}, variants: [:ios])
)
Notice that in the first call, I explicitly set the variants to an empty array. That’s because the default Rails logic of looking up variants based on the request.variant is still in place. We need to explicitly remove the ios variant from this call, whereas in the ios stream, we need to explicitly add it. And now, everything works as expected:
In a real-world scenario, we’d probably try to introduce some abstraction for creating the appropriate cable_ready calls, as there’s a little bit of duplication here. For this demo though, let’s call it a day 😅
