This post originally appeared on the AppSignal blog.
In this article we will try our hands at implementing a basic table editor for ActionText. It is heavily inspired by an excellent OnRails blog post from 2020. This report was written before the advent of Turbo, though, which we can expect to simplify matters quite a bit.
We are going to cover
- how ActionText and Trix handle attachments,
- how to implement our own
Attachabletype, - how we can leverage this to build a basic table editor,
- how Turbo helps and gets in the way at the same time.
ActionText Attachments 101
At a high level, attachments are part of ActionText’s document model. They are used to render custom templates for any resource that is resolvable by a Signed Global ID (SGID). In other words, ActionText stores a reference to a certain SGID as an <action-text-attachment> element:
<action-text-attachment sgid="BAh7CEkiCG…"></action-text-attachment>
Whenever ActionText encounters such an element, it calls the to_attachable_partial_path method on the respective resource. By default, this methods delegates to to_partial_path.
So, as a preview, this is how our Table’s representation in ActionText is going to look like when rendered back to HTML:
<action-text-attachment sgid="...">
  <table>
    <tbody>
      <tr>
        <td>Cell 1</td>
        <td>Cell 2</td>
      </tr>
      <!-- more rows -->
    </tbody>
  </table>
</action-text-attachment>
To conform with the ActionText Attachment API, a class has to do only two things:
- Implement
to_sgid, which is accomplished by includingGlobalID::Identification. By default, allActiveRecord::Basedescendants already do this. - Include the
ActionText::Attachablemodule.
This module offers the canonical ways to convert any model to and from an SGID, via the attachable_sgid and from_attachable_sgid methods. We will make use of this later on. It also provides convenience accessors for attachment metadata, such as file size and name, as well as content type. Finally, it provides the default locations for the partials used to render an attachment - in the editor and in the rich text views.
Adding a Table Model
We are going to capitalize on ActionText’s Attachment API to implement our table solution. For this, we have to create a custom model capturing our tables’ data, and include Attachable. To store the table data, we’ll use a simple JSON(B) column to hold a two-dimensional array.
To start our exploration, let’s create a new Rails app with ActionText enabled:
$ rails new trix-tables-turbo-frames
$ bin/rails action_text:install
$ bin/rails db:migrate
Because I’m not feeling creative today, let’s scaffold an Article model with a title, and rich text content:
$ bin/rails g scaffold Article title:string content:rich_text
$ bin/rails g model ActionText::Table content:json
# or, if using postgres
$ bin/rails g model ActionText::Table content:jsonb

$ bin/rails db:migrate
Watch out, here’s a surprising gotcha: Because with the above install command a CreateActionTextTables migration was already created, we need to rename it to CreateActionTextTablesTable. Additionally, we have it default to a 2x2 Table using null: false, default: [["", ""], ["", ""]].
class CreateActionTextTablesTable < ActiveRecord::Migration[7.0]
  def change
    create_table :action_text_tables do |t|
      t.json :content, null: false, default: [["", ""], ["", ""]] # create a 2x2 table by default

      t.timestamps
    end
  end
end
Add a Table to an ActionText Model
Before we continue with the actual exercise of adding a table to rich text, we need to patch Trix’ toolbar:
  // app/javascript/application.js
  import "@hotwired/turbo-rails";
  import "controllers";
- import "trix";
+ import Trix from "trix";
  import "@rails/actiontext";

+ const buttonHTML =
+   '<button type="button"
+      class="trix-button trix-button--icon trix-button--icon-table"
+      title="table" tabindex="-1"
+      data-action="trix-table#attachTable">table</button>';
+
+ const buttonGroupElement = document
+   .querySelector("trix-editor")
+   .toolbarElement.querySelector("[data-trix-button-group=file-tools]");
+
+ buttonGroupElement.insertAdjacentHTML("beforeend", buttonHTML);
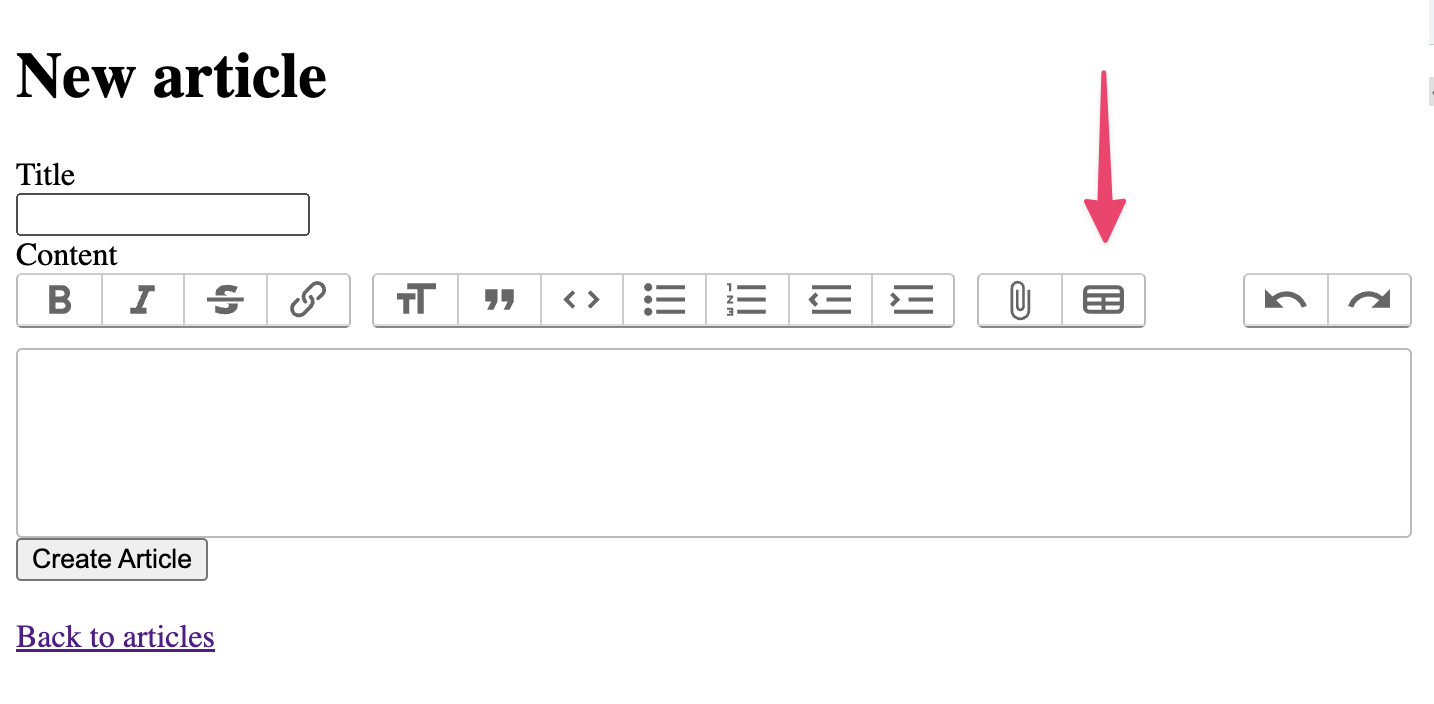
Here, we are manually appending a button to Trix’ toolbarElement. Wiring this up to a trix-table Stimulus controller (that we’ve yet to build), it will trigger inserting a table into the document. Let’s give this button a nice SVG as content in CSS, and set up some table styles while we’re at it:
/* app/assets/stylesheets/application.css */
/*
 *
 *= require_tree .
 *= require_self
 */

+  .trix-button--icon-table::before {
+    background-image: url("data:image/svg+xml,%3Csvg xmlns='http://www.w3.org/2000/svg' class='h-6 w-6' fill='none' viewBox='0 0 24 24' stroke='currentColor' stroke-width='2'%3E%3Cpath stroke-linecap='round' stroke-linejoin='round' d='M3 10h18M3 14h18m-9-4v8m-7 0h14a2 2 0 002-2V8a2 2 0 00-2-2H5a2 2 0 00-2 2v8a2 2 0 002 2z' /%3E%3C/svg%3E");
+    top: 8%;
+    bottom: 4%;
+  }
+
+ table {
+   border: 1px solid black;
+   border-collapse: collapse;
+ }
+
+ td {
+   padding: 0.5rem!important;
+   border: 1px solid black;
+ }
As you can see, we have successfully added it to the “file-tools” group:
Now let’s return to the task of adding and manipulating tables with the help of Turbo. For this, we will first need a controller with a create action:
$ bin/rails g controller Tables create --no-helper --skip-routes
This action can be more or less borrowed from the cited blog post. It constructs the JSON necessary to insert an attachment on the client side: including an SGID, and a content which is rendered from an editor partial, as we shall see later on.
# app/controllers/tables_controller.rb

class TablesController < ApplicationController
  layout false

  def create
    @table = ActionText::Table.create

    render json: {
      sgid: @table.attachable_sgid,
      content: render_to_string(partial: "tables/editor", locals: {table: @table}, formats: [:html])
    }
  end
end
We add the relevant resourceful table routes to our configuration:
  # config/routes.rb

  Rails.application.routes.draw do
    resources :articles
+   resources :tables
  end
Now comes the moment to plunge in at the deep end: We need to contemplate how to build our table model. First, let’s include ActionText::Attachable and define the relevant partial paths:
  # app/models/action_text/table.rb

  class ActionText::Table < ApplicationRecord
+   include ActionText::Attachable
+
+   attribute :content_type, :string, default: "text/html"
+
+   def to_trix_content_attachment_partial_path
+     "tables/editor"
+   end
+
+   def to_partial_path
+     "tables/table"
+   end
  end
Note that we haven’t defined how the table’s content is stored yet. Because we declared it as a JSON(B) column in our database, we are free to choose any format. Deviating from the cited blog post a bit, we are going with a two-dimensional array. Thus, we can simply do a nested loop over the content like this:
<!-- app/views/tables/_table.html.erb -->
<table>
  <% table.content.each do |row| %>
    <tr>
      <% row.each do |column| %>
        <td>
          <%= column %>
        </td>
      <% end %>
    </tr>
  <% end %>
</table>
The above is the partial that will be rendered whenever it is requested by ActionView, for example. Next, we also have to devise an editor partial to be used inline in Trix:
<!-- app/views/tables/_editor.html.erb -->
<%= turbo_frame_tag "table_#{table.attachable_sgid}" do %>
  <table>
    <% table.content.each_with_index do |row, row_index| %>
      <tr>
        <% row.each_with_index do |column, column_index| %>
          <td>
            <div contenteditable><%= column %></div>
          </td>
        <% end %>
      </tr>
    <% end %>
  </table>
<% end %>
The only difference, as you have probably noticed, is the fact that we now have wrapped it in a Turbo Frame, using the SGID as a DOM id. Furthermore, we provide row and column indexes to the separator blocks, and prepare for inline editing by making the inner DIV contenteditable - we’ll get to that later.
We are now going to connect our toolbar’s table button to the server side controller action we have just written. To do this, we first need to bring Rails’ request.js library into the project. This library will help us administer post requests from the client, including proper CSRF-tokens etc.:
$ bin/importmap pin @rails/request.js
Now that we have everything set up, let’s create a new trix-table Stimulus controller. In it, we will implement the attachTable action referenced by our toolbar button:
// app/javascript/controllers/trix_table_controller.js

import { Controller } from "@hotwired/stimulus";
import Trix from "trix";
import { post } from "@rails/request.js";

export default class extends Controller {
  static values = {
    url: String,
  };

  async attachTable(event) {
    const response = await post(this.urlValue);

    if (response.ok) {
      const tableAttachment = await response.json;
      this.insertTable(tableAttachment);
    } else {
      // error handling
    }
  }

  insertTable(tableAttachment) {
    this.attachment = new Trix.Attachment(tableAttachment);
    this.element
      .querySelector("trix-editor")
      .editor.insertAttachment(this.attachment);
    this.element.focus();
  }
}
It will POST to the tables’ create route, inserting the JSON response as a Trix attachment. This again borrows from the OnRails blog post, exchanging the deprecated rails-ujs calls for the newer request.js library. Now we have to actually make use of this controller in our app, which we do by adding it to the form’s markup:
  <!-- app/views/tables/_form.html.erb -->
- <%= form_with(model: article) do |form| %>
+ <%= form_with(model: article, data: {controller: "trix-table", trix_table_url_value: tables_path}) do |form| %>
    <% if article.errors.any? %>
      <div style="color: red">
        <h2><%= pluralize(article.errors.count, "error") %> prohibited this article from being saved:</h2>

        <ul>
          <% article.errors.each do |error| %>
            <li><%= error.full_message %></li>
          <% end %>
        </ul>
      </div>
    <% end %>

    <div>
      <%= form.label :title, style: "display: block" %>
      <%= form.text_field :title %>
    </div>

    <div>
      <%= form.label :content, style: "display: block" %>
      <%= form.rich_text_area :content %>
    </div>

    <div>
      <%= form.submit %>
    </div>
  <% end %>
The beauty of Stimulus.js shows in the way how only adding two data attributes to the form element suffices to achieve the desired result. We are now able to add tables to our article’s content with a single button click:
Manipulating the Table via Turbo Frames
Now that we are able to create table attachments, let’s shift our focus to manipulating the contents. As it turns out, Turbo Frames are almost a natural fit here.
Add and delete table rows and columns
To add and delete table rows and columns, we create a mini-toolbar consisting of four buttons, one for each operation. We make use of the button_to helper, and set the URL it will submit its enclosing form to the update route for the respective table. As additional parameters, we add the respective operation we want to trigger:
  <!-- app/views/tables/_editor.html.erb -->
  <%= turbo_frame_tag "table_#{table.attachable_sgid}" do %>
+   <div style="display: flex">
+     <%= button_to "+ Row", table_path(id: table.attachable_sgid), method: :patch, params: {operation: "addRow"} %>
+     <%= button_to "- Row", table_path(id: table.attachable_sgid), method: :patch, params: {operation: "removeRow"} %>
+     <%= button_to "+ Column", table_path(id: table.attachable_sgid), method: :patch, params: {operation: "addColumn"} %>
+     <%= button_to "- Column", table_path(id: table.attachable_sgid), method: :patch, params: {operation: "removeColumn"} %>
+   </div>
    <table>
      <% table.content.each_with_index do |row, row_index| %>
        <tr>
          <% row.each_with_index do |column, column_index| %>
            <td>
              <div contenteditable><%= column %></div>
            </td>
          <% end %>
        </tr>
      <% end %>
    </table>
  <% end %>
In turn, we also need to add the respective controller action(s) to our TablesController. Observe that the update action delegates those actions to the model.
  # app/controllers/tables_controller.rb

  class TablesController < ApplicationController
+   before_action :set_table, only: %i[show edit update destroy]

    layout false

+   def edit
+   end

    def create
      @table = ActionText::Table.create

      render json: {
        sgid: @table.attachable_sgid,
        content: render_to_string(partial: "tables/editor", locals: {table: @table}, formats: [:html])
      }
    end

+   def update
+     if params["operation"] == "addRow"
+       @table.add_row
+     elsif params["operation"] == "removeRow"
+       @table.remove_row
+     elsif params["operation"] == "addColumn"
+       @table.add_column
+     elsif params["operation"] == "removeColumn"
+       @table.remove_column
+     else
+       flash.alert = "Unknown table operation: #{params["operation"]}"
+     end
+
+     if @table.save
+       redirect_to edit_table_path(id: @table.attachable_sgid)
+     else
+       render :edit
+     end
+   end
+
+   private
+
+   def set_table
+     @table = ActionText::Attachable.from_attachable_sgid params[:id]
+   end
  end
After the changes to the table’s structure are saved, we redirect to the table’s edit view. It renders out the same editor partial, which has the side effect of referring to the same Turbo Frame. Thus Turbo can detect the matching frame and substitute one for the other.
<!-- app/views/tables/edit.html.erb -->
<%= render "tables/editor", table: @table %>
Now we have to implement the missing commands on the Table model.
  # app/models/action_text/table.rb

  class ActionText::Table < ApplicationRecord
    include ActionText::Attachable

    attribute :content_type, :string, default: "text/html"

    def to_trix_content_attachment_partial_path
      "tables/editor"
    end

    def to_partial_path
      "tables/table"
    end

+   def rows
+     content.size
+   end
+
+   def columns
+     content.map(&:size).max
+   end
+
+   def add_row(index = rows - 1)
+     content << Array.new(columns, "")
+   end
+
+   def remove_row(index = rows - 1)
+     content.delete_at(index)
+   end
+
+   def add_column(index = columns - 1)
+     content.each do |row|
+       row << ""
+     end
+   end
+
+   def remove_column(index = columns - 1)
+     content.each do |row|
+       row.delete_at(index)
+     end
+   end
  end
Notably, due to our simple data structure of a two-dimensional array, the add/remove_column/row methods are mere proxies to manipulate the column and row count. Once that is in place, we are able to change our table’s structure with button clicks:
Edit table cells’ contents
In addition to changing the amount of columns and rows, of course we also want to be able to edit the cells’ contents. To achieve this, we will again lean heavily on the cited blog post and create a Stimulus table editor controller.
// app/javascript/controllers/table_editor_controller.js

import { Controller } from "@hotwired/stimulus";
import { patch } from "@rails/request.js";

export default class extends Controller {
  static values = {
    url: String,
  };

  async updateCell(event) {
    const response = await patch(this.urlValue, {
      body: { value: event.target.textContent },
      query: {
        operation: "updateCell",
        row_index: event.target.dataset.rowIndex,
        column_index: event.target.dataset.columnIndex,
      },
      contentType: "application/json",
      responseKind: "json",
    });
  }
}
The updateCell method will issue a PATCH request whenever a cell is edited, passing the row and column index as parameters. Now all we have to do is connect it to our DOM:
  <!-- app/views/tables/_editor.html.erb -->
- <%= turbo_frame_tag "table_#{table.attachable_sgid}" do %>
+ <%= turbo_frame_tag "table_#{table.attachable_sgid}",
+    data: {controller: "table-editor", table_editor_url_value: table_path(id: table.attachable_sgid)} do %>
    <div style="display: flex">
      <%= button_to "+ Row", table_path(id: table.attachable_sgid), method: :patch, params: {operation: "addRow"} %>
      <%= button_to "- Row", table_path(id: table.attachable_sgid), method: :patch, params: {operation: "removeRow"} %>
      <%= button_to "+ Column", table_path(id: table.attachable_sgid), method: :patch, params: {operation: "addColumn"} %>
      <%= button_to "- Column", table_path(id: table.attachable_sgid), method: :patch, params: {operation: "removeColumn"} %>
    </div>
    <table>
      <% table.content.each_with_index do |row, row_index| %>
        <tr>
          <% row.each_with_index do |column, column_index| %>
            <td>
-             <div contenteditable><%= column %></div>
+             <div contenteditable
+                data-action="input->table-editor#updateCell"
+                data-row-index="<%= row_index %>"
+                data-column-index="<%= column_index %>">
+               <%= column %>
+             </div>
            </td>
          <% end %>
        </tr>
      <% end %>
    </table>
  <% end %>
The server-side TablesController, of course, now needs a way to handle this operation. Luckily, in our simplified proof of concept this is easily done by adding another branch to our condition. We also make sure that the update action now can handle JSON type requests, even if it’s merely returning an empty object here.
  # app/controllers/tables_controller.rb

  class TablesController < ApplicationController
    before_action :set_table, only: %i[show edit update destroy]

    layout false

    def edit
    end

    def create
      @table = ActionText::Table.create

      render json: {
        sgid: @table.attachable_sgid,
        content: render_to_string(partial: "tables/editor", locals: {table: @table}, formats: [:html])
      }
    end

    def update
      if params["operation"] == "addRow"
        @table.add_row
      elsif params["operation"] == "removeRow"
        @table.remove_row
      elsif params["operation"] == "addColumn"
        @table.add_column
      elsif params["operation"] == "removeColumn"
        @table.remove_column
+     elsif params["operation"] == "updateCell"
+       @table.content[params["row_index"].to_i][params["column_index"].to_i] = params["value"]
      end

      if @table.save
-       redirect_to edit_table_path(id: @table.attachable_sgid)
+       respond_to do |format|
+         format.html { redirect_to edit_table_path(id: @table.attachable_sgid) }
+         format.json {}
+       end
      else
        render :edit
      end
    end

    private

    def set_table
      @table = ActionText::Attachable.from_attachable_sgid params[:id]
    end
  end
Note that in a production app, I would advise you to choose a different strategy for sanitizing the operation than an if/elsif/else condition. I would probably reach for a Mediator or Proxy in this case.
Caveats
Up to this point, I assume this account has made perfect sense, but I have left out a critical detail. While we are persisting the underlying database model just fine, we are not syncing it to Trix’ internal shadow representation. That’s why, upon focusing out of the table, it snaps back to the stored representation from before:

If we were to refresh the page now, the added content would appear, because Trix’ document is freshly initialized.
I have traced this problem down to the point where Trix syncs its internal document when the selection is changed. It just unfurls it from the shadow element here.
I tried hooking into the turbo:submit event and preventing the sync just when blurring a table, but the solutions I came up with all seem very hairy and highly dependent on internal API.
The most Turbo-esque way of dealing with this, I guess, would be to wrap the whole form in an eager loaded Turbo Frame and tell it to reload whenever Trix’ contents change.
Something like this should do the trick:
// app/javascript/controllers/trix_table_controller.js

// ...

connect() {
  this.element.addEventListener("turbo:submit-end", (e) => {
    this.element.closest("turbo-frame").reload();
  });
}

// ...
If you enclose your form in a Turbo Frame that you load from src:
<!-- app/views/articles/edit.html.erb -->
<h1>Editing article</h1>

<%= turbo_frame_tag dom_id(@article, :form), src: form_article_path(@article) %>
This approach, though, would only work with already persisted base records.
Conclusion
The proof of concept we’ve built is compelling for its use of server-rendered HTML to do away with the added complexity of serializing tables to JSON and listening for JavaScript events. It is portable to any ActionText installation and could be easily extracted to a gem.
There are a couple of drawbacks, though, the most obvious one being the necessary re-syncing with Trix’ document model. There might be situations where the proposed workaround is workable, and others where it’s a No-Go. Until Trix might gain a Turbo-compatible interface, there’s no way around it.
The second catch is that it does not make use of Trix’ undo functionality (but that is true of any Trix attachment). Likewise, it would be wise to wait for upstream changes instead of tweaking the internal API.
Opportunities
Given that Trix v2, featuring a translation from CoffeeScript to plain modern JavaScript is underway, I think now would be a good time to address its Turbo-compatibility. Currently the scope of what such a wrapper should look like is beyond my capabilities, but it sure looks like window of opportunity.
References: https://onrails.blog/2020/09/30/adding-tables-to-actiontext-with-stimulus-js/
Github repo: https://github.com/julianrubisch/trix-tables-turbo-frames
